Friday, December 4, 2009

Our week on sequences

Top, middle, and bottom
  • Build a tower that is one color on top, another in the middle, and a different one on bottom.
  • Sing "Head, Shoulders, Knees and Toes." Discuss which body parts are on top, middle, and bottom.
  • Sing "On Top of Spaghetti." Make spaghetti for supper.
  • Make a Three Layer Desert from pudding, whipped topping, and crushed Oreo cookies.
  • Make 3 monsters. Cut them into head, torso, and legs. Trade sections to create new monsters.

First, next, and last

  • Sing "Peanut Butter" song. Talk about what you do first, next, and last to make a peanut butter sandwich. Then make one!
  • Do Five Little Pumpkins (or variation to fit the current holiday) finger play.
  • Do the Cheerios counting book.

The Little Red Hen

  • Read the book
  • Use YouTube to show harvest, threshing, and grinding the wheat into flour. John Deere also makes videos on this process.
  • Make bread or cookies. Discuss the value of working.
  • Build a cottage for the little red hen out of blocks.

Three Little Pigs

  • Collect straw, sticks, and bricks to show him what they look and feel like.
  • Act out the story. Take turns being the wolf and pigs.
  • Make pig tales from pink curling ribbon. Tuck them into your pants waistband. Chase each other and play tag by capturing the other person's tail.
  • Make pigs in a blanket for supper.

One, Two, Buckle My Shoe

  • Do the rhyme.
  • Play hide and seek. Emphasize counting to ten.
  • Practice buckling a belt or shoes.
  • Put two stripes of making take down on the table top. Practice lining the pretzel sticks up between the lines.
  • Glue pictures inside a file folder. Cut doors to lift and guess what the picture is while only reveling part of it.

Weather Week

We love discussing weather. Every morning Greg and I talk about the current conditions. Is the sky cloudy or sunny? Is the temperature hot or cold? Is it windy or calm? During weather week we read God's Plan for Weather

Temperature (hot vs. cold)
  • Make a paper doll. Dress him for hot and cold weather. Discuss the type of clothing worn in different conditions.
  • Play Hot and Cold. Hide an object. Clue him to where it is by using the word hot to indicate he's close and cold to indicate he's far away from the target.
  • Make pudding. Pour it into Popsicle molds. Freeze and eat.
  • Melt crayons in the oven. Then pour the melted crayon onto paper and watch it solidify. Discuss the changes in the crayon that the changes in temperature create.
  • Freeze a small toy inside an ice cute. Then put it in a warm spot and watch it melt.

The Sky (sunny vs. cloudy)

  • Play shadow tag. Point out that you can only play shadow tag on a sunny day.
  • Paint with water on the sidewalk. Discuss that the sun makes the water evaporate.
  • Look through a prism to show the colors in sunlight.
  • Cut out different types of clouds from a poster board. Put the clouds on the ground. Hop from cloud to cloud.
  • Cut out 6 different clouds. Trace them on a blue piece of paper. Shade in the traced clouds in gray. Have child match the cut out with it's shadow on the blue paper.

Rain

  • Sing Rain Rain Go Away.
  • Use a spray bottle to make 'rain' on a cookie sheet. Compare the sound of a mist to a downpour by adjusting the nozzle on the bottle.
  • Play umbrella up-side-down. Toss squishy balls into an upside-down umbrella.
  • Watch storm footage on YouTube. Find rain, tornado, and hurricane footage. Discuss that dark clouds are often full of water droplets and bring rain.
  • Draw a storm scene with crayons. Then paint over it with blue water colors.
  • Create static electricity and compare it to lightening.

Wind

  • Use wind to blow bubbles. Chase the bubbles as the wind blows them.
  • Make a kite from a paper bag and yarn. Decorate it with crayons/markers and stickers. Go outside and fly the paper bag kite.
  • Rock a stuffed animal and sing "Rock a bye Baby"
  • Try to blow several item across the table with the 'wind' you make from your mouth. Which things float easier?

Snow

  • Ice skate on the carpet. Use rectangles of wax paper under you feet to slide on the floor.
  • Snowball fight. Crumple white paper into balls for the snow balls.
  • Cut snowflakes from pieces of paper.
  • Make a marshmallow snowman. Anchor him to a Graham crackers. Use frosting for features. Use pretzel stocks for arms.
  • Fill a box with the flake style fake snow and play with it like sand.

Photobucket

Sunday, November 8, 2009

Shapes Week

This week we studied shapes: circle, square, triangle, ellipse (I was told this is the new name for oval), and rectangle. We read the book The Wing on a Flea by Ed Emberly. As a special treat on Saturday, we went to the Kansas BEST Robotics competition to cheer on Southeast High School. Greg was intrigued by the robots. We came home and built our own out of Lego's.
Photobucket

Circle Day
  • Play "Ring Around the Rose"
  • Play with the ring stacker and discuss the sizes of the circles
  • Put circle stickers (colored dots) on each other and on a box. Play inside the box as our "Dotty House"
  • Eat round butter crackers
  • Draw circles on the sidewalk with chalk. Step from circle to circle.
  • Hit a balloon back and forth with circular paper plates.

Square Day

  • Do Washington Square rhyme: From here to there to Washington Square; when I get near, I'll pull your hair.
  • Eat Cheese Zit type of crackers
  • Build with square alphabet blocks. Make squares out of the blocks and count the squares.
  • Cut squares out of sand paper and make crayon rubbings of the squares.

Triangle Day

  • Bake cup cakes inside ice cream cones (that didn't work so well)
  • Make pizza and cut it into triangle slices.
  • Play music on the triangle.
  • Set-up the Tee-Pee and play.
  • Make a triangle hat out of folded newspaper.

Ellipse Day

  • Put a chocolate chip inside 15 different Easter eggs. Parent hides the eggs. Greg hunts for the eggs and we discuss the shape.
  • Throw the football.
  • Hit balls off the T-Ball stand with a tennis racket.
  • Slice bananas at an angle to create ovals.

Rectangle Day

  • Make a stained glass rectangle to hand on the window. Make two identical rectangles out of wax paper. Use a cheese grater to shave crayons. Sandwich the crayons between the two pieces of wax paper. Use an iron on low heat to melt the crayons and seal the wax paper together.
  • Build with rectangular blocks.
  • Make rectangles out of cardboard and step on them as if you were in a life size board game.
  • Make lasagna in a rectangular pan.
  • Build a fort out of a large, rectangular blanket.

Saturday, October 31, 2009

State Fair Fun

This was our first trip to the Kansas State Fair as a family. Toby and I have been talking about it since we got married but finally got around to it. We had to start at the livestock barns. We saw people grooming sheep, goats, and cattle for the show. Then we were "grossed-out" at the K-State Animal Birth Center. We moved quickly though the poultry and rabbits so we could see the alpaca's fleece being spun into yarn. We had a lot of fun in 'Ag Land' crawling through the soil tunnel, comparing different grains, driving a mock combine, and milking a cow. Toby and I pulled Greg through the commercial barns. Greg picked one ride for us to enjoy, the train of course. Greg had to sit in every boat, tractor, 3-wheeler, motorcycle, and lawn mower in the "big boy's toys" commercial area. We introduced Greg to Pronto Pups and Funnel Cakes. I was the only parent to wear the paper sack hat that their child made at Do Art.
Photobucket

The Pumpkin Carvers

We love pumpkins! Greg loves to go out into the pumpkin patch and pick them right off the vine. Our first adventure was to the Priest Pumpkin Patch in Winfield, KS. We were one of the first customers of the season to walk thought their fields of large green leaves and orange pumpkins. Look at all this variety in their farmer's market area!
Photobucket
Last year Greg and I had so much fun at Walter's Pumpkin Patch, that Toby decided to take a day off of work to go with us this year. Walter's Pumpkin Patch has so much to do. First we rode on a wagon pulled by a tractor to the pumpkin patch to pick our pumpkin.
Photobucket
We also got to slide down pumpkin hill on a saucer sled, jump on the giant inflatable pumpkin, play in the corn, pet the goats, ride adult and child-sized tricycles, go through corn and hay mazes. Greg also climbed this rope ladder. I was so proud of him! He did it with very little help.
Photobucket
We did Bergmann's Corn Maze, but I don't have any pictures of that. We went at night. It was fun, but I must give you some warnings. Expect mud. Bring your own flashlight. Be prepared to carry your 2 yo. You must pay for the inflatables advertised on their web-site with cash. Don't rely on the info in the web-site; call to confirm their hours of operation.

This year we participated in the pumpkin carving party at the zoo. That was so much fun. We each carved a pumpkin for the Night of the Living Zoo celebration. It was a cold night. Next time we will make sure to wear more layers and bring gloves. They did provide some piping hot chocolate. Just in case you can't tell, the pumpkins are dotty, kissing grommies, and a dog's face.
Photobucket

The Elusive Girl Cow

I haven't told you about "Girl Cow" yet. She showed up at our house early in August. No, we haven't acquired a new pet. Girl Cow is Greg's first imaginary friend. Girl Cow plays with Greg, sleeps in his bed, rides with us in the car... We've learned that she is small enough for Greg to hold in his hand. She's a dairy cow, white with black spots. Greg has added to his circle of imaginary friends to include several cartoon characters, but Girl Cow was the first. Tonight at Tricks not Treats I had to explain to Greg that since the workers couldn't see Girl Cow, she couldn't get a bag of candy. He decided to share his candy. BTW, I am so proud of the little boy Greg is becoming. He was so polite at Tricks not Treats tonight. He said "thank you," "excuse me," "please," and patiently waited his turn.

Photobucket

Tuesday, September 22, 2009

An Enlightening Trip to the Mall

Every Monday Greg and I go to the mall. We meet another SAHM and son for a little shopping, a lot of chatting, and tons of socialization. The mall has a great new kids play area. Everything is fall safe: the floor is spongy, the climbing equipment is soft and rounded. Greg looks forward to the mall from Sunday afternoon and talks about it all day Monday. He loves seeing his friend and playing. Yesterday didn't go so well though. When we got there I chose to sit in a new spot. Greg walked to our old spot and sat down. He took off his shoes and put them in the cubby-hole where he always does. Then, instead of playing, he came and sat in my lap. When his friend got there Greg had trouble sharing. He was fussy and crabby. We even had to leave early due to a giant temper-tantrum.
My friend asked me "Greg thrives on routine, doesn't he?" The answer is a resounding yes! It took Toby and I awhile to figure this out. I don't know why, I'm the same way. When things don't go as I expect, I get crabby. Greg had a lot of problems sleeping until Toby and I became disciplined enough to get him to bed at the same time every night. It changed Greg's whole temperament. He would wake up in the night unable to sleep and go through the days in cranky exhaustion. Greg also loves music; the predictable repetition of the beat and melody delights his senses. He learned the actions to "Twinkle, Twinkle Little Star" by 15 months. I always attributed my annoyance with a break in routine as control issues (and I'm sure it is in part), but now I see that it's part of my personality. Greg and I love routine!
This leads me to a whole list of questions: How can I help him to adapt to changes in routine? How can I respect his need for routine? What does this reveal about God's purpose for my son?

Photobucket

Sunday, September 13, 2009

A Successful Garage Sale and More!

How do you know when your garage sale is successful? Is it when you've made more than $100? Is it when you start and end on time? NO! It's when you can park your cars in the garage again. We only made $20 at our garage sale. We started at about 9:30 am and ended at 1:30. We left a lot of stuff by the curb (which all disappeared). We met our goal: to get rid of enough stuff to park both vans in the garage.
Successful Garage Sale
Today was Grandparents' Day. Since our cards will be late (sorry Mom and Dad), we made an electronic greeting on the front sidewalk.
Grandparents' Day 2009

Tuesday, September 1, 2009

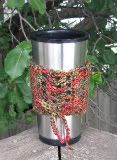
Coffee Cup Corset Crochet Pattern

One of my friends requested that I make a coffee cup cozy for her. I wanted to make an adjustable cozy that would fit coffee cups of many sizes. I came up with this idea.

Row 1: Chain 55
Row 2: In the 3rd chain from the hook, hdc. (Chain one and skip one chain. Hdc in the next chain.) Repeat between parentheses 5 times so that at the end you have 6 hdc with 5 chains between them. Chain 2 and turn the work over.
Row 3: Hdc in each hdc and chain across for a total of 11 hdc. Chain 2 and turn the work over.
Row 4-23: Hdc across. Chain 2 and turn the work over.
Row 24: Hdc in the first stitch. (Chain one and skip one stitch. Hdc in the next stitch) Repeat between parenthesis 5 times so that at the end you have 6 hdc with 5 chains between them.
Row 25: Chain 42
Take the beginning chain and lace it through the holes chain one holes in row 24. Take the last chain and lace it through the chain one holes in row 2. Tighten to size of the cup. Then tie a bow at the bottom.

Use worsted weight yarn. I used Lion Brand Vanna’s Choice. One 3 oz skein makes 5.5 corsets.

Launder inside a lingerie bag. Machine wash warm or cold, tumble dry on low.

Photobucket

Wednesday, August 5, 2009

A craft that you can eat!

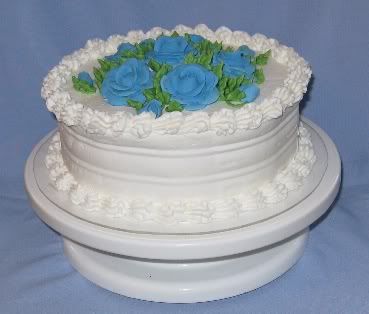
I know this is not what I normally show you pictures of, but we sure enjoyed making them. I helped with a wedding cake yesterday. DS really wanted to make a cake too. So, today we made a little trip to the grocery store.
Photobucket
He licked the beaters. Don't worry, it's not cake batter, just icing.Here's our finished product
Photobucket
We had a little batter leftover, so we made these petit flours.
Photobucket

Wednesday, July 29, 2009

What Happened to July?

Where did my month go? I turned 31 this July! For my birthday, my wonderful husband surprised me with a professional massage. Wow! That was nice. I also got a hair cut.
Before:
Photobucket
After:
Photobucket
Greg impressed me this month with his building skills. He created a 17-block-tall tower! Just look at my little architect. He also started learning how to use the potty. Yay!
17 Block Tower
With a lot of hard work and support from my ladies at church and online, I've lost about 10 pounds. I'll be losing more weight soon. Tomorrow I get my second gum graft. Ouch!

Saturday, July 11, 2009

The Itsy Bitsy Spider

Greg decided to use my orange yarn to make a spider web yesterday. When he was done building the web he sang "The Itsy Bitsy Spider" with actions all by himself! It was so cute. I'm thankful I can be home with him so I don't miss things like this.

Photobucket

Saturday, May 30, 2009

A Day At Home

We've had a busy week, so yesterday we decided to stay at home all day. I tried to take pictures of all the things we did to keep ourselves busy. I didn't get a picture of some of our fun because I was just too busy playing too. We started our day with some personal grooming.
Photobucket
After breakfast, we turned some yarn hanks into skeins. With a lot of help from me, Greg was able to work the ball winder.
Photobucket
We did some crafting. Greg was sewing while I was knitting.
Photobucket
We worked on our computers.
Photobucket
We finger painted with shaving cream.
Photobucket
And of course, we did some cooking.
Photobucket

What a busy day!

Monday, May 11, 2009

Happy Belated Mother's Day to me!

Guess what I got in the mail today... A yarn ball winder and a swift! Yay for me! The swift didn't even come with directions but I was able to set it up and use it. It was so easy to use. Both came from Joanns.com. I got the Royal winder and the small umbrella swift.
Photobucket

Thursday, April 23, 2009

Earth Day!

We've been under the weather this week. I feel like I've dropped off the face of humanity! My son isn't sleeping well. He hasn't been since Good Friday. By now we're all exhausted and on the verge of illness. We had a quiet, at-home Earth Day celebration. We mowed the lawn with the reel lawn mower and got a great workout. We took a little walk around the neighborhood. Here's a great pic of my little son experimenting with dandelions. I'm sure all the neighbors appreciated him spreading the seeds everywhere!
Photobucket

Tuesday, April 7, 2009

The Big Day!

Wow, what a busy day we have today! Today is the first day that 'the girls' are exercising at the church. It's also the last day of my son's 'Story Time' program at the library. We will also have our second visit with our Parents As Teachers coach. She comes to our house to teach some new games to play. My house is a mess! Today is also the day I go live as a guest with The Chain Gang on Hyena Cart. Here's the link if you want to check it out http://hyenacart.com/TheChainGang/ I'm excited and nervous!

Sunday, March 22, 2009

I've been dreading taxes...

I usually have our taxes done by the beginning of March, but I've been putting them off this year. Why? I have to report my income from my WAHM business. I've kept good records of all my transactions for money, but I didn't keep any records of my trades. I was not aware that I had to report barter income. I'm going through a year long list of created items to try to remember what I bartered and how much it's worth. Yuck!

Wednesday, March 11, 2009

10 Great Things about my Husband

1) He truly loves the Lord and desires to know him personally.

2) He has a smooth voice. I love to hear him sing or read to me.

3) He is a great Dad who really enjoys interacting with our son.

4) He is great at fixing computers.

5) He's one of the few people who has the ability to help me see myself with humor.

6) He likes to read and think.

7) He is handsome.

8) He trusts me financially. I don't have to justify purchases to him.

9) He has a great sense of humor. He can make me laugh.

10) I know he loves me, even if it often seems like he doesn't.

Saturday, February 21, 2009

21 Little Hats

These 21 hats were made by the ladies of our local Prayer Shawls ministry. They will be going to the NICU at one of our local hospitals tomorrow. My son and I washed them this morning. When I asked him what they were, he said "Sick babies hats." I feel so accomplished that we have made so many hats. I hope they are a great comfort to the babies and their parents.
Photobucket

Tuesday, February 17, 2009

My Miracle Son

Every baby is a miracle, but my son is especially so. Let me explain...

When my husband and I finally decided to start a family we got pregnant right away. Almost immediately I started having problems. My doctor diagnosed the pregnancy as ectopic or tubal. The clinic did a sonogram and the radiologist saw the pregnancy in my tube. I was sent directly to the hospital where their radiologist confirmed the diagnosis. The hospital staff kept me overnight for observation. In the morning my OB decided to do surgery to remove the pregnancy. I was inconsolable. I insisted on delaying the surgery for a few minutes so that I could contact my support network and ask for their prayers. This was my first time as a patient in the hospital since I was born! I was terrified. When I woke up from the surgery, I asked how it went. The nurses told me that my OB had not found an ectopic pregnancy. I asked if I was still pregnant and they told me to ask my OB for more info. Well, I just start to laugh. I was pregnant and God had a plan for this baby! My OB cautiously warned me that I may miscarry due to the drugs and trauma of the surgery. They monitored my hormonal levels every other day for a week. At the end of the week, they did a sonogram and saw the pregnancy safely in my uterus.

Fast forward to 12 weeks into the pregnancy. I went for my first prenatal visit with the OB. She told me that we should be able to hear the baby's heart beat. Well, we couldn't. We scheduled another sonogram and thankfully, there was a heart beat. Things seemed to be normal until the next visit. I normally have great blood pressure readings, but at this visit my blood pressure was elevated. OB decided I need to do a 24 hour urine collection. Unfortunately I was about 16 weeks pregnant and it was my 4 year wedding anniversary! Can you imagine? I lugged a cooler full of urine with me every where we went during our celebrating. The urine test was normal, but my blood pressure remained elevated. It got higher and higher as the baby grew and I developed liver pain.

At my 38 week visit my OB decided that they baby needed to come now. I entered the hospital under observation for preeclampsia. After 2 hours of observation my blood pressure did not return to normal. At 10:30 on Thurs. Dec. 20 my OB started to ripen my cervix. The baby had not dropped, my cervix was not effaced or dilated. Yikes! After a sleepless night, they started me on pitocin at about 10 am on the 21st. I was so upset. I wanted to go into naturally. I wanted to labor in the comfort of my own house until I had to go to the hospital. I wanted a peaceful, drug-free, minimal medical intervention birth. That was not happening! At about 12:30 pm, the resident broke my water and labor became very intense. After about 2 hours of labor I consented to an epidural. I felt like a failure giving in. The hospital staff encouraged it with the hope that it might reduce my blood pressure. I was so glad I had it though! It relaxed me so much I was able to nap after a sleepless night. Labor was a long process since I wasn't allowed to move off the bed. At about 10:00 that night I developed an infection and had to be put on IV antibiotics. Unfortunately, I'm allergic to penicillin, erythromycin, and sulfa, so the Dr's invested some thought into an antibiotic choice that was safe for both of us. At 11:30, I was allowed to start pushing. Wow, did I push. I pushed and pushed for about 2 1/2 hours. I developed 3 tares, one of them a 3rd degree. I was exhausted, but the doctors warned that if I didn't endure they would need to use forceps, or worse, a c-section. Finally, at 1:36 am on the 23rd (yes, that's 27 hours after the process started) my son was born. But that wasn't the end of the problems.

Unfortunately, I can only make half the amount of milk that a baby needs - even with the help of fenugreek and regularin. I did not know this. I had received counsel to not supplement with formula or water, that my milk would come in eventually. Well, after about 5 days, we were suspicious that our son was not receiving enough food. At his first pediatric appointment, his doctor diagnosed him as severly dehydrated. We spent the next 4 days in the hospital while his blood chemistry returned to normal. I also had to learn to supplement my own milk with formula through various techniques.

He had a rough start, but my little blessing is a normal, healthy, 2-year-old boy now. He's our Christmas present from God that we got to open 2 days early.
Photobucket

Sunday, February 8, 2009

Customs List and Status

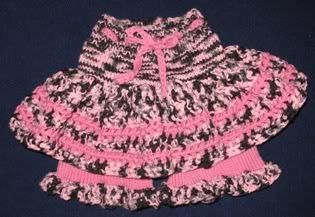
Prom Skirtie

Nov 2009 - Limit 3
2) natalee_ava
3) Ajna - one down, one to go

Dec 2009 - Limit 3
1) Mommyz
2) green.mommy
3) clothlovinmamaof2

Jan 2010 - Limit 2
1) gooseymama
2) bright_eyes_mama on CDN

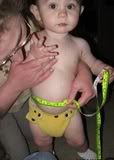
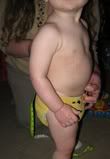
How to Measure for Woolies

Accurate measurements will ensure a good fit for your child.

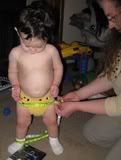
1) Waist: measure at your child's natural waist.
Waist

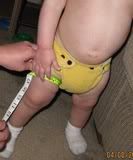
2) Rise: Put the 0 end of the tap measure at baby's belly button. Thread the tape measure between his/her legs and up above the top of the diaper.
Rise

3) Hips: Wrap the tape measure over the widest part of the diaper booty in the back and the widest part of the hips side to side.
Hips

4) Thigh: Wrap the tap measure around the thickest part of baby's thigh.
Thigh

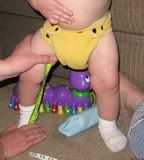
5) Inseam: Measure from the bottom of the diaper to the floor for longies. Bottom of diaper to knee for shorties (or to desired length). Baby should have a straight leg, model was not being cooperative.
Inseam

Carver Creations Policies

1) I don't require a deposit to hold your spot. Please notify me if you wish to relinquish your custom spot. When it is your turn on my waiting list I will contact you to finalize all details. Please let me know before hand if you will be out of communication for a few days so that I may make appropriate adjustments to my customs list. If we have not made previous arrangements and you are unable to respond within 7 business days I will move to the next customer that is waiting.

2) To ensure a proper fit I have instructions on how to measure your child for wool. You may view my tutorial here "How to Measure for Woolies."

3) Please see my care instructions "How to keep your hand-dyed wool looking it's best". Wool will felt with normal use. Some babies are sensitive to certain types of wool yarn. Wool can experience compression wicking. Some dyes will bleed into the wash water so please wash each wool item separately. The colors of wool, like all fibers, tend to fade with use.
4) I wash and lanolize woolies prior to shipping them.

5) Please let me know how the item fits and functions when you receive it. I enjoy hearing positive input. I also appreciate constructive criticism because it allows me to improve my craft. All returns are made at the discretion of the seller.

6) I usually ship orders within 2-3 days after your order is completed and payment is received. All instock items are shipped within 48 hours. My postage paid prices are for customers in the U.S. Canadian buyers please add $1. If you do not pay within 30 days, then I will sell your item. I do recommend the purchase of postal insurance on all orders. If you choose not to purchase postal insurance, I will not be responsible for lost, stolen, or damaged packages. NO REFUNDS OR REPLACEMENTS will be issued for uninsured orders.

7) I ask for payment when I'm done creating. I can accept both funded and credit card (please cover fees) Paypal and Revolution Money Exchange.

8) For yymh/yymn spots: I encourage you to research yarn types and dyers before purchasing yarn. You are welcome to have the yarn seller ship it directly to me. If you are not sure that you will like the yarn, I recommend that the seller ship it to you first. I will return leftover yarn weighing 0.5 ounce or more. Yarn amounts under 0.5 ounce, I will keep. Please purchase the recommended amount and weight/type. The weight (bulky, sport, worsted) of the yarn will determine how much I need for a given item.

Saturday, February 7, 2009

What's the difference between knit and crochet?

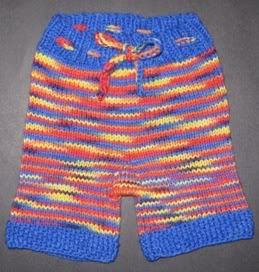
Here's an exmaple of knit shorties Zander Shorties


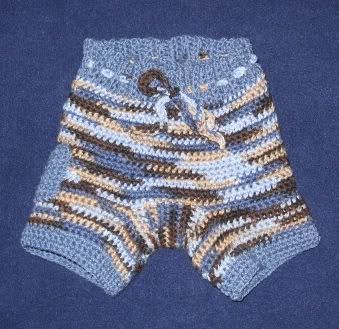
This one is crochet Wedgewood Cargo Shorties


Beyond the difference in appearance, crochet and knit have many functional differences. Crocheted items are thicker than knit, making them more leak-proof. Knit is thinner, making it more hot weather friendly. The thickness of crochet makes it more durable in the long run. Knit starts to look thin after multiple shavings. Knit stretches mostly width-wise while crochet stretches more length-wise. Crochet uses more yarn to complete the same size project. The actual stitches of crochet are generally larger with larger spaces between stitches than knit. Knit stitches are smaller and closer together. Knitting can be done by machine, but crochet must be hand made. For crochet woolies, I would recommend something done in single crochet, half double crochet, or Tunisian crochet. For knitted longies, I would recommended something with 4 or more stitches per inch.
Wednesday, February 4, 2009

How to Take Good Care of Your Woolies

My personal preference:
I like Buddha Bunz wool wash. Turn your woolies inside out, that way if you overlanolize, the lanolin spots won't show up when your child wears the wool. First I rinse the wool by filling the bathroom sink with cool water and gently squishing the wool in the water. I put about a nickle size blob of wool wash in the bottom of a large bowl. I add just enough warm water to cover the bottom of the bowl. Then I swish the water to create a small lather. Next I fill the bowl with cool water. I put the woolie in the bowl and squish it around until I feel that it's clean. Then I let it soak for about 30 min. I pour the wash water and wool into the washing machine and use the spin cycle to remove the excess water (take care to ensure that your washing machine is set to no hot water or agitation). Then I lay the wool over a collapsible drying rack. It usually takes about 24 hours to dry. I like Buddha Bunz wool wash because it has enough lanolin in it that I don't have to lanolize. Melinda also offers a lanolin spray if you need just a little lanolin boost between washings. http://hyenacart.com/prod_details.php?id=54056&vid=1379

Baby shampoo and lansinoh method:
Always use room temperature water when washing and rinsing wool. Be gentle with them as you hand wash, too much friction and heat on the fibers will cause them to felt. Turn the wool inside out before washing. Rinse the wool by hand in cool water. Add wool wash or baby shampoo to new room temperature water. Squish and squeeze water into the wool instead of rubbing. Rinse the wool with cool water if you are using baby shampoo. Roll them in a towel to absorb excess moisture and lay flat to air dry. Wool does not need to be washed after every use, only when it smells dirty. You can spot clean with a wool wash bar. When the wool begins to loose its waterproof quality it will need to be lanolized. After the washing process, take a small Tupperware container. Fill it half way with hot water. Put in a tiny amount of wool wash or baby soap and about ½ inch of lanolin (I use the breast cream). Put the lid on the Tupperware and shake until the lanolin has dissolved. Pour this into your sink. Add warm water gradually turning to cold water until the water feels cool. Put the wool into this water and allow it to soak for 10-15 min. Rinse the wool with lukewarm water when soak is over. Lay flat to dry.

Photobucket

Monday, February 2, 2009

How to keep your hand-dyed wool looking it's best

Hand-dyed yarns tend to fade over time. It's a bummer, but it's true. Here's a few tips to help reduce the fading.

1) Don't leave your woolies laying out in the sun. That means don't dry them on a line, leave them on the floor in the sun, store them in a clear container... Don't take this to the extreme. Do let your little one play in them outside.

2) Use unscented wool wash to clean them. The essential oils used to fragrance wool wash encourages the dye to fade and bleed.

3) Don't let your woolies soak in wool wash for extended periods of time. When you wash your woolies let them sit for about 15-20 min. If you let them soak for more than 30 min., the dye will start to bleed into the water.

4) If the dye in the yarn begins to bleed into the water when you wash your woolies, reset the dye.

Hopefully you can learn from my mistakes. Here's one of the first longies that I made when they were brand new:
Photobucket
And here's the same pair after 15 months of love and abuse:
Photobucket

Sunday, February 1, 2009

My Amazing Son

My son is now 2 years, 1 month, 1 week, and 2 days old. He learns new information, especially words so fast! I know all the data about toddlers brains are wired for language acquisition, but I'm just so amazed to see it in action. He learns faster than me and he's only two years old.
Photobucket
Here he is helping me dye some corridale yarn for a wool soaker.

Crochet Pattern for Felted Wool Balls

I created this pattern for our Prayer Shawls Ministry. We make balls out of acrylic yarn and stuff them with fiberfill for the kiddos in the pediatric ward at the hospital.

Great for playing. Great for dryer balls. I’d recommend using an un-dyed yarn for dryer balls to prevent the dye from bleeding on your clothes.

Materials
G-hook
Worsted-Weight Wool Yarn (not super wash)
Wool yarn scraps or clippings

Row 1 Chain 2. Work 6 single crochets in the 1st chain. Join with a slip stitch to the first single crochet.
Row 2 Work 2 single crochets in each single crochet. Join with a slip stitch to the first single crochet. 12 sc
Row 3 Work 1 single crochet in the 1st single crochet. Work 2 single crochets in the next single crochet. Repeat to the end. Join with a slip stitch to the first single crochet. 18 sc
Row 4 Work 1 single crochet in each of the next 2 single crochets. Work 2 single crochets in the next single crochet. Repeat to the end. Join with a slip stitch to the first single crochet. 24 sc
Row 5 Work 1 single crochet in each of the next 3 single crochets. Work 2 single crochets in the next single crochet. Repeat to the end. Join with a slip stitch to the first single crochet. 30 sc
Row 6 Work 1 single crochet in each of the next 4 single crochets. Work 2 single crochets in the next single crochet. Repeat to the end. Join with a slip stitch to the first single crochet. 36 sc
Row 7-12 Work 1 single crochet in each single crochet around. Join with a slip stitch to the first single crochet. 36 sc
Row 13 Work 1 single crochet in each of the next 4 single crochets. Work 1 single crochet decrease in the next 2 single crochets. Repeat to the end. Join with a slip stitch to the first single crochet. 30 sc
Row 14 Work 1 single crochet in each of the next 3 single crochets. Work 1 single crochet decrease in the next 2 single crochets. Repeat to the end. Join with a slip stitch to the first single crochet. 24 sc
Row 15 Work 1 single crochet in each of the next 2 single crochets. Work 1 single crochet decrease in the next 2 single crochets. Repeat to the end. Join with a slip stitch to the first single crochet. 18 sc
Stuff the yarn clippings into the ball.
Row 16 Work 1 single crochet in the next single crochets. Work 1 single crochet decrease in the next 2 single crochets. Repeat to the end. Join with a slip stitch to the first single crochet. 12 sc
Row 17 Work 1 single crochet decrease in the next 2 single crochets. Repeat to the end. Join with a slip stitch to the first single crochet. 6 sc
Row 18 Fold remaining stitches in half. Slip Stitch across the 3 doubled stitches. Cut yarn. Tie in a knot and pull the tail into the ball.

To Felt: put the ball in your next load of dark colored towels. Wash and dry it on hot. Repeat to desired felted state. Remember, bright colors may probably bleed, so don’t do this with nice towels.

Photobucket

Wednesday, January 28, 2009

Hello Everybody and How Are You Today

I've been thinking about a blog for a while. I need someplace to journal about my life, my creative expression, and my goal to loose weight. Here it is!